
Making candles at home requires five basic elements: wax, wicks, fragrance, containers, and heat. You melt the wax to a specific temperature, add scent at the proper ratio, secure a centered wick in your vessel, pour carefully, and allow the candle to cure for at least 48 hours before burning.
The craft of candle making has transformed from necessity to creative practice over the past century. What once served purely functional purposes now offers makers control over ingredients, scent composition, and aesthetic expression. Understanding how to make candles at home provides not only a rewarding hobby but also insight into the chemistry and artistry behind scented products.
What materials do you need to make candles at home?
You need wax, wicks, fragrance oils or essential oils, containers or molds, a double boiler or melting pot, a thermometer, and wick-centering devices. The wax forms the candle body, wicks deliver fuel to the flame, fragrance provides scent throw, and containers hold the finished product while appropriate tools ensure safe handling and consistent results.
Beyond these basics, a scale for precise measurements becomes essential when you advance beyond beginner batches. Measuring by weight rather than volume ensures reproducible results, particularly when calculating fragrance load percentages. A heat-resistant pitcher with a pour spout simplifies transferring melted wax into containers without spills.
Sourcing quality materials matters more than acquiring specialized equipment. Start with tested wick and wax combinations rather than experimenting blindly, which leads to tunneling, poor scent throw, or smoking flames.
Choosing the right wax type
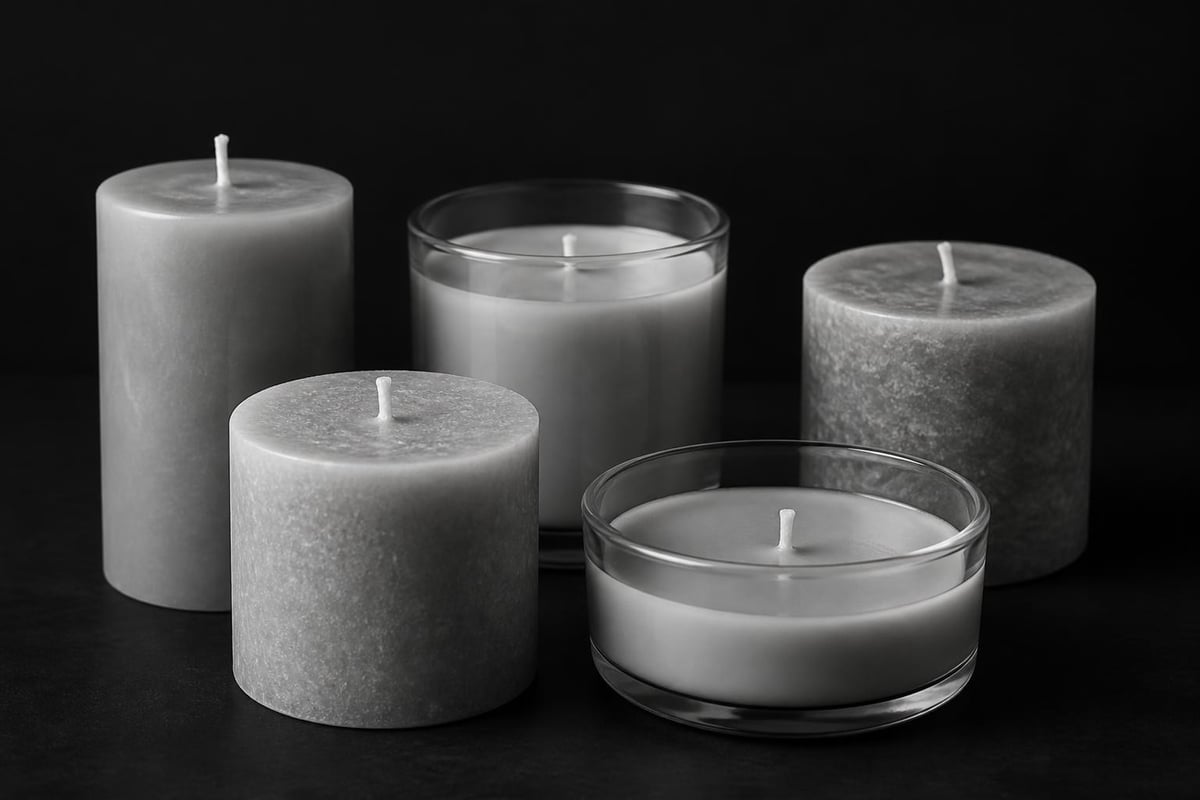
Different waxes deliver distinct performance characteristics. Wax selection affects burn time, scent throw, appearance, and sustainability.
| Wax Type | Burn Time | Scent Throw | Texture | Best For |
|---|---|---|---|---|
| Soy | Medium-Long | Moderate | Smooth, creamy | Container candles, vegan formulations |
| Beeswax | Long | Low-Moderate | Natural honey color, textured | Pillar candles, natural aesthetic |
| Coconut | Medium | High | Very smooth | Luxury containers, strong scent delivery |
| Paraffin | Medium | Very High | Glossy | Maximum fragrance throw, vibrant dyes |
| Blends | Varies | Customizable | Depends on ratio | Balancing performance needs |
Soy wax dominates home candle making because it melts cleanly, holds fragrance well, and comes from renewable sources. It adheres reliably to glass containers and releases from molds without requiring additives. Coconut wax costs more but offers superior scent throw and a luxurious finish that appeals to premium candle makers.
How do you select and size wicks for homemade candles?
Match wick diameter to your container width and wax type by consulting manufacturer wick charts or conducting burn tests. A properly sized wick creates a full melt pool across the candle surface within two to three hours, burns steadily without smoking, and maintains a flame height of approximately half an inch to one inch.
Wick sizing determines whether your candle burns efficiently or fails. Too small a wick causes tunneling, where wax remains along container walls, wasting material and limiting scent release. Oversized wicks produce excessive flames, carbon buildup, and soot deposits on vessels.
Cotton wicks suit soy and beeswax formulations, burning cleanly at moderate temperatures. Wood wicks create crackling sounds and wider melt pools, requiring different sizing approaches than braided cotton. Eco wicks contain paper cores that help wicks stand upright during pouring.
When learning how to make candles at home, start with pre-tabbed wicks that include metal bases. These anchor easily to container bottoms using hot wax or adhesive dots, maintaining centered positions throughout the pour.
Conducting wick burn tests
- Pour identical test candles using your chosen wax, fragrance, and container with three different wick sizes.
- Burn each test candle for four hours, observing melt pool development, flame height, and smoke production.
- Measure the melt pool diameter after two hours and again after four hours.
- Note any mushrooming on wick tips, soot on container walls, or incomplete melting.
- Select the wick that achieves full melt pool coverage without excessive flame or residue.
Testing removes guesswork from production batches. Record your results with specific wax types, fragrance loads, and container dimensions to build a reference library.
What is the proper temperature for melting and pouring wax?
Heat wax to 170-180°F for melting, add fragrance between 175-185°F, and pour between 120-140°F for container candles or 160-175°F for pillar candles. Temperature control affects adhesion, scent retention, and surface finish quality throughout the candle-making process.
A reliable thermometer prevents overheating, which degrades wax quality and burns off volatile fragrance compounds. Clip-on candy thermometers work adequately, though infrared thermometers offer faster readings without contamination risk.
Never heat wax above 200°F. Excessive temperatures create fire hazards and damage wax molecular structure. If wax begins smoking, remove it from heat immediately and allow cooling before resuming.
Different pour temperatures create different surface effects. Lower temperatures produce rustic, textured tops while higher temperatures yield smooth, glossy finishes. Container candle tutorials demonstrate how pour temperature impacts layered designs and color transitions.
Managing double boiler safety
Fill the bottom pot with water to approximately two inches depth, ensuring it does not touch the upper vessel. Bring water to a simmer rather than a rolling boil, which agitates wax unnecessarily. Add wax to the top pot in chunks, stirring occasionally as it melts. Monitor both water level and wax temperature continuously, never leaving heating wax unattended.
How do you add fragrance to homemade candles?
Calculate fragrance by weight at six to ten percent of total wax weight, add it when wax reaches 175-185°F, stir thoroughly for two minutes, and allow the mixture to cool to proper pouring temperature before filling containers. Proper fragrance integration ensures even scent distribution and optimal hot throw during burning.
Fragrance blending techniques vary between synthetic oils and natural botanical extracts. Synthetic fragrances typically tolerate higher heat and deliver stronger scent throw, while essential oils and plant extracts require gentler handling to preserve aromatic complexity.
For those interested in botanical scents made from real plant and resin extracts, understand that natural fragrances often require higher usage rates to achieve comparable throw to synthetic alternatives. Test at eight to ten percent for essential oil blends versus six to eight percent for fragrance oils.
- Cold throw describes how the candle smells unlit, influenced by fragrance concentration and wax surface area.
- Hot throw measures scent released during burning, affected by wax type, wick size, and fragrance quality.
- Cure time allows fragrance molecules to bind with wax, typically improving over 48 hours to two weeks.
Stirring technique matters as much as temperature. Use figure-eight patterns to distribute fragrance evenly without incorporating excess air bubbles. Avoid vigorous whisking, which creates foam that transfers to finished candles as surface imperfections.
What is the step-by-step process for pouring container candles?
The systematic approach to pouring ensures professional results and minimizes common defects.
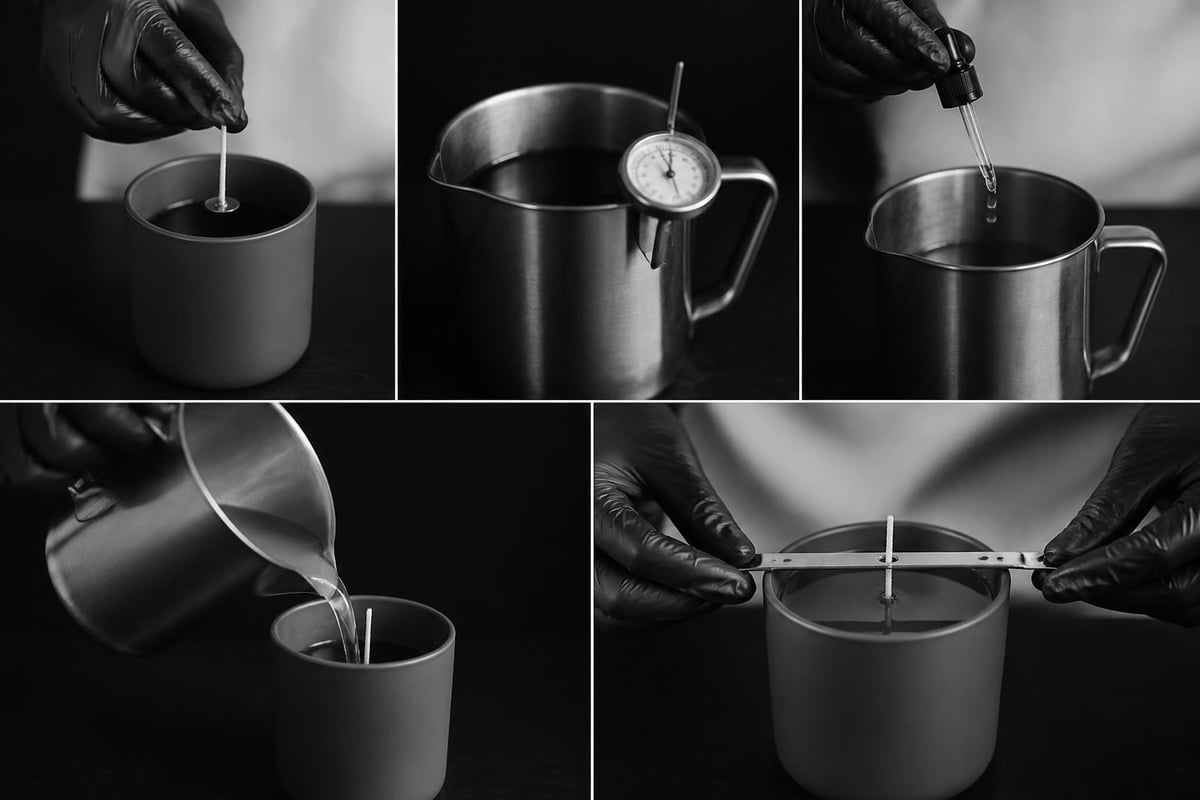
- Prepare containers by cleaning them thoroughly and ensuring they are completely dry.
- Secure wicks to container centers using wick stickers or a small amount of melted wax.
- Melt wax to target temperature in a double boiler while monitoring with a thermometer.
- Add fragrance at the appropriate temperature and stir thoroughly for two minutes.
- Allow the wax-fragrance mixture to cool to optimal pouring temperature for your wax type.
- Pour slowly down the side of containers to minimize air bubbles, filling to desired height.
- Use wick-centering devices or clips to maintain wick position during cooling.
- Allow candles to cool undisturbed at room temperature for at least 24 hours.
Avoid moving containers during the initial cooling phase. Vibration or relocation causes surface cracks and uneven setting. Room temperature affects cooling rates, with cooler environments producing frosting on soy candles and warmer spaces sometimes creating sinkholes.
Addressing common pouring problems
Sinkholes form when wax contracts away from wicks during cooling. Poke relief holes around wicks after initial setting and top off with reserved wax at slightly higher temperature. Wet spots appear as air pockets between wax and glass, often caused by pouring too cool or containers being too cold. Preheat containers to 90-100°F before pouring to improve adhesion.
Frosting creates crystalline patterns on soy candles, particularly in cooler environments. While purely cosmetic, it can be minimized by pouring at higher temperatures or using wax additives, though many makers embrace it as characteristic of natural wax.
How long should candles cure before burning?
Cure candles for a minimum of 48 hours and ideally seven to fourteen days before burning to allow fragrance molecules to bind completely with wax. Curing improves scent throw, stabilizes the wax structure, and ensures optimal burning performance when customers light the finished product.
The chemistry of curing involves fragrance oil migration and crystallization processes. Wax molecules arrange themselves into stable formations while volatile compounds distribute evenly throughout the candle mass. Rushing this process by burning too early results in weak scent throw and incomplete combustion.
Store curing candles at consistent room temperature away from direct sunlight and temperature fluctuations. Cover them loosely to prevent dust accumulation while allowing air circulation. Label each batch with pour date and fragrance details for quality control tracking.
Patience during curing separates amateur from professional results. While 48 hours makes candles technically burnable, extended curing to seven days consistently improves performance. Soy candles benefit most from longer cure times, while paraffin often reaches peak performance faster.
What safety practices should candle makers follow?
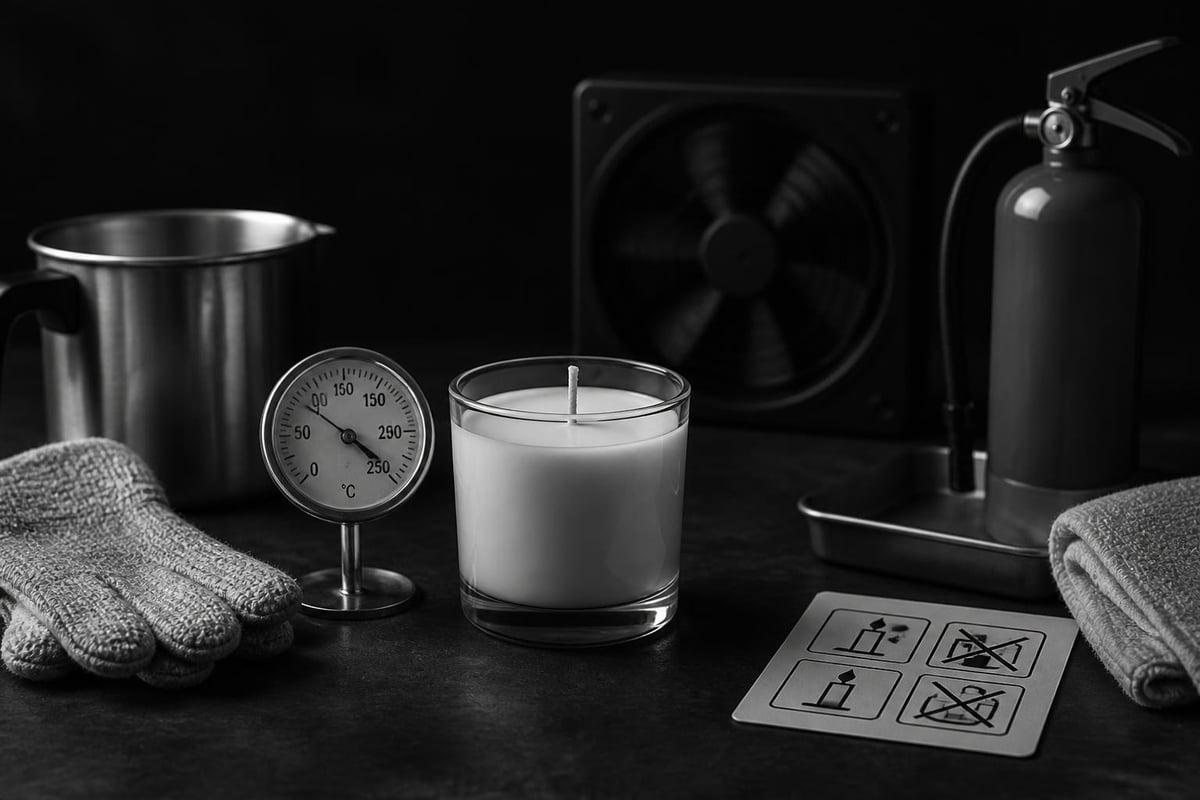
Follow fire safety protocols by never leaving heating wax unattended, keeping a fire extinguisher accessible, working in a well-ventilated area, and understanding proper response to wax fires, which require Class B extinguishers or baking soda rather than water. Safety extends beyond production to consumer education about proper burning practices.
The National Fire Protection Association guidelines emphasize prevention measures including keeping burning candles within sight, away from flammable materials, and on stable heat-resistant surfaces. When teaching others how to make candles at home, stress that safety knowledge protects both makers and eventual users.
Production safety requires different considerations than burning safety:
- Wear heat-resistant gloves when handling hot vessels or pouring large batches.
- Use dedicated equipment for candle making rather than food preparation items.
- Maintain organized workspaces with clear paths away from heat sources.
- Store wax and fragrance oils in cool, dark locations away from ignition sources.
- Keep accurate records of ingredients for troubleshooting and replication.
How do you label and store finished candles?
Include burn time estimates, fragrance descriptions, safety warnings, and ingredient lists on professional labels applied after complete curing. Store finished candles in cool, dark locations between 50-70°F to preserve fragrance integrity and prevent discoloration or frosting development before sale or gifting.
Professional presentation builds trust and provides necessary safety information. Industry safety standards guide label content requirements, including warnings about burn time limits, keeping wicks trimmed, and fire prevention.
Label information should cover:
| Required Information | Purpose | Example |
|---|---|---|
| Burn time per session | Prevents tunneling | "Burn 2-4 hours per session" |
| Wick trimming | Reduces soot and mushrooming | "Trim wick to 1/4 inch before each use" |
| Safety warnings | Fire prevention | "Never leave burning candle unattended" |
| Fragrance description | Sets expectations | "Botanical blend of cypress and cedar" |
| Net weight | Consumer information | "8 oz / 226g" |
Storage conditions significantly impact shelf life. Ultraviolet light degrades both wax and fragrance over time, causing color fading and scent deterioration. Temperature fluctuations create condensation issues with certain wax types, particularly soy formulations.
When producing scented products for sale or as thoughtful gifts, consistent storage prevents quality variations between batches. Stack containers carefully to avoid pressure damage to lids or labels.
What troubleshooting steps fix common candle defects?
Identify problems through systematic observation during burning tests, then adjust single variables like wick size, pour temperature, or fragrance load to isolate causes. Common defects include tunneling from undersized wicks, poor scent throw from insufficient fragrance or incorrect wax temperature, and surface imperfections from environmental conditions during cooling.
Tunneling remediation requires wick upsizing or adjusting container diameter relative to wax type. Test progressively larger wicks until achieving full melt pools. Sometimes tunneling indicates fragrance load exceeding wax capacity, which weakens the wax structure.
Weak scent throw stems from multiple potential causes requiring methodical testing. Increase fragrance load in one-percent increments up to maximum recommended levels. Verify addition temperature falls within optimal range for your fragrance type. Consider switching wax varieties, as some naturally deliver better hot throw than others.
Smoking and soot indicate oversized wicks or contaminated wax. Downsize wicks or ensure working with clean, additive-free wax. Certain fragrances contain components that promote soot formation regardless of wick sizing.
Creating a testing protocol
Maintain detailed production notes including wax type and weight, fragrance name and percentage, wick size and type, pour temperature, cure time, and burn test observations. When problems arise, reference successful batches to identify deviations. Change one variable at a time across test runs to determine causation rather than correlation.
Where can beginners find reliable candle-making resources?
Access manufacturer-provided technical data sheets for wax and wick specifications, join online candle-making communities for peer support, and study resources from organizations like the National Candle Association for industry best practices. Combining scientific understanding with community experience accelerates the learning curve when starting how to make candles at home.
Equipment suppliers often provide free tutorials and troubleshooting guides specific to their product lines. These resources connect theoretical knowledge with practical application using materials you already own. Video demonstrations clarify techniques difficult to convey through text alone, particularly pouring methods and wick-centering approaches.
Local workshops offer hands-on instruction under experienced guidance. For those in New York, exploring botanical candles made with natural wax and real plant extracts provides insight into professional production methods emphasizing ingredient quality over synthetic shortcuts.
Online communities foster knowledge exchange among makers at all skill levels. Search for groups focused on natural candle making if your interest centers on botanical formulations rather than conventional fragrance oils. Members share supplier recommendations, troubleshoot problems collectively, and celebrate successes together.
The U.S. Fire Administration guidance offers critical safety information that protects both makers and consumers. Understanding fire prevention creates responsible crafters who produce candles that bring ambiance without risk.
Frequently Asked Questions
How much does it cost to make candles at home?
Initial setup costs range from $75-150 for basic equipment including a double boiler, thermometer, and starter supplies of wax, wicks, and fragrance. Per-candle material costs typically run $3-8 depending on container quality, wax type, and whether you use natural botanical fragrances versus synthetic oils. Bulk purchasing reduces unit costs significantly once you establish preferred formulations and commit to larger production batches.
Can you make candles without special equipment?
You can make basic candles using household items like a large pot for a double boiler, a meat thermometer, and recycled glass containers. However, dedicated equipment improves safety and consistency. Avoid using kitchen items that will return to food preparation. A scale, proper thermometer, and heat-safe pouring pitcher cost under $50 combined and dramatically improve results for anyone learning how to make candles at home.
What causes candles to have sinkholes or wet spots?
Sinkholes develop when wax contracts during cooling, often due to pouring too hot or cooling too quickly. Prevent them by pouring at lower temperatures and cooling slowly at room temperature. Wet spots occur when wax separates from container walls, usually from pouring too cool or containers being cold. Preheat containers to 90-100°F and pour soy wax at 120-135°F to minimize both issues.
How do natural botanical fragrances differ from synthetic oils in candles?
Botanical fragrances derived from plant extracts offer complex, nuanced scent profiles but typically require higher usage rates and may have lighter hot throw than synthetic alternatives. They cost more, require lower working temperatures to preserve delicate compounds, and appeal to customers seeking natural, vegan formulations. Synthetics deliver stronger scent throw at lower percentages and offer consistent availability regardless of harvest seasons affecting natural materials.
Is candle making profitable as a home business?
Candle making can generate profit margins of 40-60% when pricing accounts for materials, labor, packaging, and marketing costs. Success requires developing distinctive products, building brand recognition, managing inventory efficiently, and understanding regulatory requirements for cosmetic products. Start-up costs remain relatively low compared to many crafts, but profitability depends on production efficiency, ingredient sourcing, and effective marketing to reach target customers seeking your specific aesthetic or fragrance philosophy.
What container materials work best for homemade candles?
Glass containers perform best for most candle makers because they withstand heat, display candle aesthetics clearly, and clean easily for reuse. Select heat-tempered glass rated for candle use, avoiding thin decorative glass that may crack. Metal tins work well for travel candles and rustic aesthetics. Ceramic containers require testing to ensure they do not retain excessive heat. Avoid plastic, wood, or paper containers that present fire hazards when exposed to sustained flame heat.
Learning how to make candles at home combines chemistry, creativity, and attention to detail in equal measure. The process rewards patience during curing and methodical testing to refine formulations. Whether you pursue candle making as a meditative craft or potential business venture, quality ingredients and safety practices form the foundation of satisfying results. For those drawn to botanical scents crafted from real plant extracts rather than synthetic fragrances, Haus of Smell demonstrates how natural ingredients create distinctive, vegan candles hand-poured in Manhattan. Their commitment to 100% botanical formulations offers inspiration for makers seeking to work with nature rather than chemistry labs.